How to set up a server rack
It is essential to know how to set up a server rack to get the most out of your installation and ensure it meets the needs of the customer. If you know how to set up a server rack properly, you will be able to provide an optimised set-up ready for equipment to be installed.
This is a general guide to setting up a server rack – always refer to the manufacturer's instructions and local regulations before starting and keep them handy throughout the installation.
How to choose the correct server rack
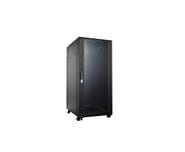
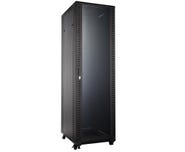
Before installing your server rack, you must check the dimensions of the server to ensure you choose a rack with adequate depth. Some racks come with adjustable mounting channels. Rails will always be standard 19-inch mounting (unless specified otherwise). The cable management required at the side will determine the width required. The height is determined in “rack units” so it is important to know what the rack will contain to determine the RU required. Once you know the depth, height, and width you need, you are ready to start looking at the racks available.
You must keep in mind the rack's type of mounting hole. Mounting holes can be unthreaded, threaded or square holes. If you have any equipment that could not be mounted directly on the mounting channel, you can always purchase adjustable shelves that would solve this problem.
What are the steps to install a server rack?
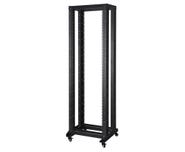
- First, you must adjust the depth of the mounting rails to ensure adequate space for the deepest equipment you will be installing. These are usually pre-installed but are adjustable.
- Install any shelves that are required. These should be at the height to suit the equipment that they will support. E.g., computer monitor at eye level.
- Install any cable management if not already installed to the sides of the rack.
- Move the server rack into position.
After these basic steps are complete, you are ready to start installing the equipment.
How to install the server rack equipment
While installing the server rack equipment, you must make sure that you put the heavier equipment on the bottom of the server rack. This will provide a sturdy base if the server rack is tall. If you keep the heavy equipment on the top, there is a risk that the server rack might fall over.
You must tighten the screws properly. You must make sure that you do not damage or strip the screws. To install heavy and difficult-to-handle equipment, you should seek help from someone to prevent any harm to yourself or the equipment.
Next, we come to the installation of the server rack equipment. Install the equipment using the type of screw that is supported by the mounting rails. Ensure you have installed the server rack equipment securely so that nothing is loose or unstable.
If you face any difficulty installing the server rack or installing the equipment in the server rack, you should contact a technical support team for assistance.
Some tips for successfully installing your server rack
- Install the server rack in a room that you can lock to keep visitors and unauthorised employees out.
- You should choose a space that is secure and has no or few windows to reduce exposure to light.
- Servers may generate a lot of noise and heat, so be sure to keep the rack in an area where the equipment can be kept cool.
- It is good to keep your server rack away from busy areas as there is always a risk of people bumping into the racks.
- Always over-estimate rather than under-estimate the size of server rack required – you never know what could change in the future.
- You must ensure that the server rack equipment is installed correctly and securely, and compatible with the rails and rack.
- Label and organize your equipment properly for easy identification.
Want to save time on your next installation? MSS Data Solutions server racks come with key components pre-assembled, meaning less time assembling the server rack on-site.
-
 HYPERTEC
Hypertec R19 Open Frame 4 Post 42RU 600D
Item Number:
HR4P42RU6-S
Packaging Unit: 1 / each
$730.82 (Excl. GST)
HYPERTEC
Hypertec R19 Open Frame 4 Post 42RU 600D
Item Number:
HR4P42RU6-S
Packaging Unit: 1 / each
$730.82 (Excl. GST)
-
 HYPERTEC
Hypertec R19 Server Rack 42RU 600W 600D 2055H
Item Number:
HR42RU6-S
Packaging Unit: 1 / each
$1,558.00 (Excl. GST)
HYPERTEC
Hypertec R19 Server Rack 42RU 600W 600D 2055H
Item Number:
HR42RU6-S
Packaging Unit: 1 / each
$1,558.00 (Excl. GST)
-
 HYPERTEC
Hypertec R19 Server Rack 32RU 600W 1000D 1655H
Item Number:
HR32RU1-S
Packaging Unit: 1 / each
$1,463.00 (Excl. GST)
HYPERTEC
Hypertec R19 Server Rack 32RU 600W 1000D 1655H
Item Number:
HR32RU1-S
Packaging Unit: 1 / each
$1,463.00 (Excl. GST)
-
 HYPERTEC
Hypertec R19 Open Frame 2 Post 42RU 600D
Item Number:
HR2P42RU6-S
Packaging Unit: 1 / each
$566.20 (Excl. GST)
HYPERTEC
Hypertec R19 Open Frame 2 Post 42RU 600D
Item Number:
HR2P42RU6-S
Packaging Unit: 1 / each
$566.20 (Excl. GST)
-
 HYPERTEC
Hypertec R19 Server Rack 24RU 600W 900D 1255H
Item Number:
HR24RU9-S
Packaging Unit: 1 / each
$1,368.00 (Excl. GST)
HYPERTEC
Hypertec R19 Server Rack 24RU 600W 900D 1255H
Item Number:
HR24RU9-S
Packaging Unit: 1 / each
$1,368.00 (Excl. GST)
-
 HYPERTEC
Hypertec R19 Server Rack 32RU 600W 800D 1655H
Item Number:
HR32RU8-S
Packaging Unit: 1 / each
$1,444.00 (Excl. GST)
HYPERTEC
Hypertec R19 Server Rack 32RU 600W 800D 1655H
Item Number:
HR32RU8-S
Packaging Unit: 1 / each
$1,444.00 (Excl. GST)
-
 HYPERTEC
Hypertec R19 Server Rack 42RU 800W 1000D 2055H
Item Number:
HR42RU1W8-S
Packaging Unit: 1 / each
$2,090.00 (Excl. GST)
HYPERTEC
Hypertec R19 Server Rack 42RU 800W 1000D 2055H
Item Number:
HR42RU1W8-S
Packaging Unit: 1 / each
$2,090.00 (Excl. GST)
-
 HYPERTEC
Hypertec R19 Server Rack 42RU 600W 900D 2055H
Item Number:
HR42RU9-S
Packaging Unit: 1 / each
$1,805.00 (Excl. GST)
HYPERTEC
Hypertec R19 Server Rack 42RU 600W 900D 2055H
Item Number:
HR42RU9-S
Packaging Unit: 1 / each
$1,805.00 (Excl. GST)
-
 HYPERTEC
Hypertec R19 Server Rack 42RU 600W 800D 2055H
Item Number:
HR42RU8-S
Packaging Unit: 1 / each
$1,615.00 (Excl. GST)
HYPERTEC
Hypertec R19 Server Rack 42RU 600W 800D 2055H
Item Number:
HR42RU8-S
Packaging Unit: 1 / each
$1,615.00 (Excl. GST)
-
 HYPERTEC
Hypertec R19 Server Rack 42RU 600W 1000D 2055H
Item Number:
HR42RU1-S
Packaging Unit: 1 / each
$1,805.00 (Excl. GST)
HYPERTEC
Hypertec R19 Server Rack 42RU 600W 1000D 2055H
Item Number:
HR42RU1-S
Packaging Unit: 1 / each
$1,805.00 (Excl. GST)
-
 HYPERTEC
Hypertec R19 Server Rack 42RU 800W 1200D 2055H
Item Number:
HR42RU1200W8-S
Packaging Unit: 1 / each
$2,660.00 (Excl. GST)
HYPERTEC
Hypertec R19 Server Rack 42RU 800W 1200D 2055H
Item Number:
HR42RU1200W8-S
Packaging Unit: 1 / each
$2,660.00 (Excl. GST)
-
 HYPERTEC
Hypertec R19 Server Rack 24RU 600W 1000D 1255H
Item Number:
HR24RU1-S
Packaging Unit: 1 / each
$1,368.00 (Excl. GST)
HYPERTEC
Hypertec R19 Server Rack 24RU 600W 1000D 1255H
Item Number:
HR24RU1-S
Packaging Unit: 1 / each
$1,368.00 (Excl. GST)
-
 HYPERTEC
Hypertec R19 Server Rack 18RU 600W 600D 988H
Item Number:
HR18RU6-S
Packaging Unit: 1 / each
$1,140.00 (Excl. GST)
HYPERTEC
Hypertec R19 Server Rack 18RU 600W 600D 988H
Item Number:
HR18RU6-S
Packaging Unit: 1 / each
$1,140.00 (Excl. GST)
-
 HYPERTEC
Hypertec R19 Server Rack 32RU 600W 600D 1655H
Item Number:
HR32RU6-S
Packaging Unit: 1 / each
$1,425.00 (Excl. GST)
HYPERTEC
Hypertec R19 Server Rack 32RU 600W 600D 1655H
Item Number:
HR32RU6-S
Packaging Unit: 1 / each
$1,425.00 (Excl. GST)
-
 HYPERTEC
Hypertec R19 Server Rack 24RU 600W 600D 1255H
Item Number:
HR24RU6-S
Packaging Unit: 1 / each
$1,235.00 (Excl. GST)
HYPERTEC
Hypertec R19 Server Rack 24RU 600W 600D 1255H
Item Number:
HR24RU6-S
Packaging Unit: 1 / each
$1,235.00 (Excl. GST)
-
 HYPERTEC
Hypertec R19 Server Rack 45RU 600W 800D 2188H
Item Number:
HR45RU8-S
Packaging Unit: 1 / each
$1,805.00 (Excl. GST)
HYPERTEC
Hypertec R19 Server Rack 45RU 600W 800D 2188H
Item Number:
HR45RU8-S
Packaging Unit: 1 / each
$1,805.00 (Excl. GST)
-
 HYPERTEC
Hypertec R19 Server Rack 45RU 600W 1000D 2188H
Item Number:
HR45RU1-S
Packaging Unit: 1 / each
$1,898.10 (Excl. GST)
HYPERTEC
Hypertec R19 Server Rack 45RU 600W 1000D 2188H
Item Number:
HR45RU1-S
Packaging Unit: 1 / each
$1,898.10 (Excl. GST)
-
 HYPERTEC
Hypertec R19 Server Rack 45RU 800W 1000D 2188H
Item Number:
HR45RU1W8-S
Packaging Unit: 1 / each
$2,267.95 (Excl. GST)
HYPERTEC
Hypertec R19 Server Rack 45RU 800W 1000D 2188H
Item Number:
HR45RU1W8-S
Packaging Unit: 1 / each
$2,267.95 (Excl. GST)
Recent Articles

Test Network Cabling & Patch Cords FAST with the New DATATESTER by CABAC
Testing LAN cables is quick and easy when you’ve got the new CABAC DATATESTER on hand. This budget LAN cable tester is perfect for contractors who need to test data and coaxial cable for correct termination.
View Products
Exploring the Advantages of Thin Patch Leads
For Australian data installers, selecting the right network components is critical to achieving the performance and reliability that your customers expect. Among these components, the humble patch lead plays a crucial role in interconnecting various devices.
View Products
FOBOT Buying Guide
In this informative article, we will provide a basic buying guide for FOBOTs or “Fibre Optic Break Out Trays” so that you can choose the right product for your specific needs.
View Products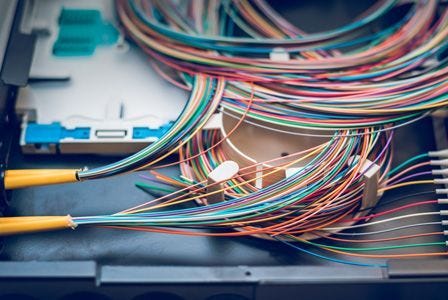
What is a FOBOT?
In this article, we will explain what a FOBOT is and where they are used. We will also describe how a FOBOT works and the important role this component plays in managing and distributing optical fibres efficiently. So, if you're looking to learn all about FOBOTs, make sure to read this article...
View Products
What is the difference between OS1 and OS2 Singlemode Optical Fibre?
This technical article delves into the differences between OS1 and OS2 Singlemode fibre optics, including their core characteristics, performance specifications, and ideal applications.
View Products